Today, we’re going to settle the question once and for all – which is superior? Documentation in a plain-text editor using Markdown, or creating content in a rich-text editor the WYSIWYG (what you see is what you get) way? How will it be decided, you ask? A good, clean head-to-head fight!
Mr. Mark ‘Markdown’ Down
In the left corner: Mr. Mark “Markdown” Down, lightweight champion of the world for writing web content into plain text files. You can recognize Markdown easily by his file extension .md, but you don’t need an MD to understand it – the syntax is so simple that any developer in the world can adapt to it with ease.
Mark’s strengths: code handling, offline availability, minimalism and something he likes to call “bringing it down.”
Supported by: Jekyll, your favorite text editor (e.g. Emacs), and file repositories such as Github.

Mr. Richard ‘Rich Text’ Formatting
In the right corner: Richard “Rich Text” Formatting – used by millions of casual writers who want to see their results instantly. Rich doesn’t see many advantages in separating editing from viewing: “Juggling markup syntax? What is this, the ‘90s?”
Rich’s strengths: advanced content formatting skills, editor shortcuts (and he’s not afraid to use them), and immediate availability of the resulting document.
Supported by: the Atlassian Confluence collaboration platform and wiki, and other cloud-based content creation tools such as Google Docs. Microsoft Word isn’t a big fan, though.

Let’s Get Ready To Rumble!
This match will go the full 12 rounds. Mark and Rich will flex their muscles to see who can create and publish content faster and easier.
Round #1: Getting Started

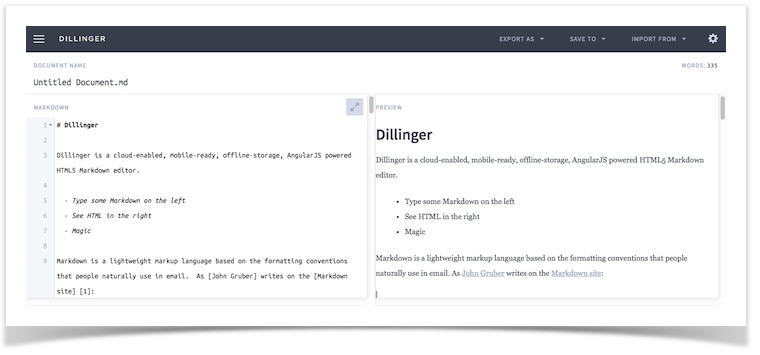
Markdown: “Oh, this one’s easy – open a new document in the text editor and start typing.” Or use an online markdown editor such as dillinger.io that supports synchronization with Dropbox, Google Drive and Github.
Rich Text: “The same goes for me. Just create a new document, give it a title and away you go.” Before the web arrived, using a desktop text processor to format rich text was the norm. Today, rich text authoring is done collaboratively in a web browser, using a content collaboration platform such as Atlassian Confluence.
Round #2: Defining Headings and Paragraphs
Markdown: “Enter 1 to 6 hash characters before your headers, e.g. # This is a H1 for a first-class heading, or ## This is a H2 for a subheading.” Creating a paragraph is even easier. Mark recommends: “Write consecutive lines of text followed by a blank line to create a paragraph.”
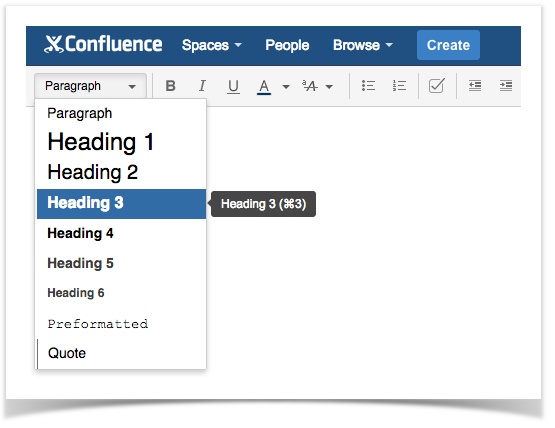
Rich Text: “I don’t like blank lines, useless spaces or hashes. Instead, write a heading or paragraph, and assign the corresponding paragraph format.” Using the rich text approach, writers need only to select the desired heading level or paragraph format from the toolbar once.
Round #3: Using Bulleted and Numbered Lists
Markdown: “Choose your favorite list item (*/+/-) to create bullet points, or just start numbering your ordered list items (1., 2., etc.).”
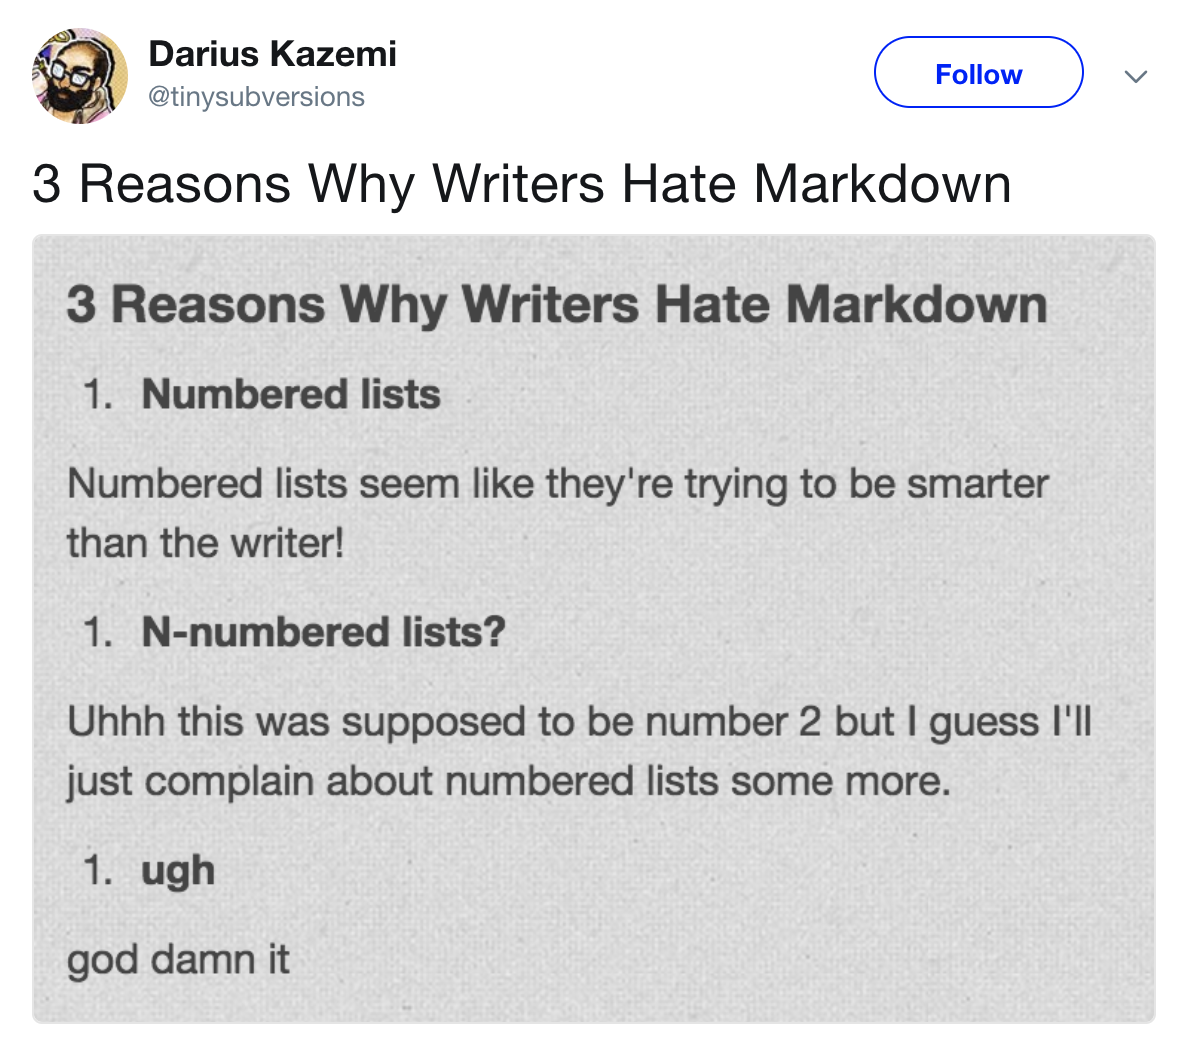
If you don’t want the problem in the above tweet to happen to you, you’ll need to enter a tab (or four spaces) before you begin to write paragraphs within a list.
Rich Text: “Hmph. That just looks like a workaround, not a real solution. To add line breaks within a list item, simply press Shift+Return in the Confluence editor instead of pressing the Return key.”
Round #4: Embedding Code and Block Quotes

Markdown: “Just indent your lines of code with a tab or at least four spaces so they’re recognized as code. A no-brainer, right?” Absolutely – code is automatically indented in any development environment.
Rich Text: “I can do code examples and script listings too! Sure, you’ll need to wrap Confluence’s Code Block macro around them – but once that’s done, you can define proper syntax highlighting for your programming/scripting language, line numbering, and more.”
Round #5: Inserting Tables
Markdown: “Okay, so I’m not perfect. Tables are only supported by inline HTML, which you can write whenever a markup element isn’t covered by Markdown’s syntax.”
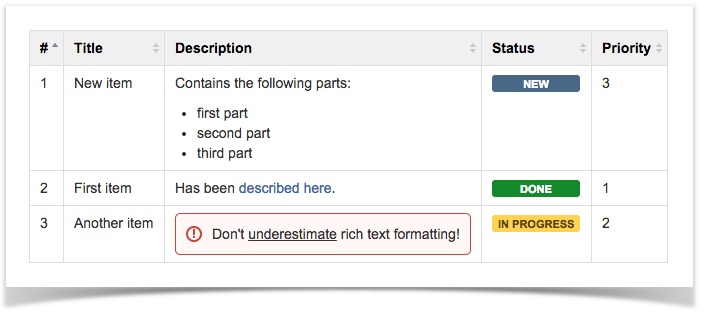
Rich Text: “In the Confluence rich content editor, adding tables and managing tabular content is a breeze. Just click the Table button in Confluence’s editor toolbar, and voila.”
Round #6: Images and Other Media Assets
Markdown: “OK, I admit it – embedding images into a plain text document format isn’t easy.” There are two different ways to do it:
-
Inline (within a paragraph):
, for example!Logo (/folder/logo.jpg "My Logo") -
Reference-style:
[id]: url/to/image "Optional title attribute", for example[logo]: /folder/logo.jpg "My Logo"
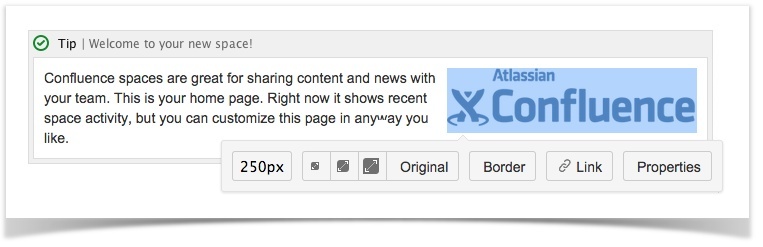
Rich Text: “Great media support is one of the reasons why they call me ‘Rich’. Give me almost any file type, and I’ll display it however you want. Scaled proportionally and aligned on the right? No problem!” In Confluence, just drag and drop an image into the editor to upload it automatically. You can also use a Multimedia macro to embed videos or other multimedia formats.
Round #7: Defining Links
Markdown: “This is pretty similar to embedding images. There are two ways to build links:
-
Either place the URL after the link text, e.g.
[link text](http://example.com/“Title”), -
or include it as a reference, with the ID placed behind the link text.”
Rich Text: “Just select the link text and click the link icon in the toolbar to select a target. That’s it.”
Round #8: Using the Keyboard
Markdown: “You don’t need your mouse to work with Markdown. You can do everything using your keyboard. However, this means each syntax element must be entered manually, unless you use a markdown editor with syntax completion.”
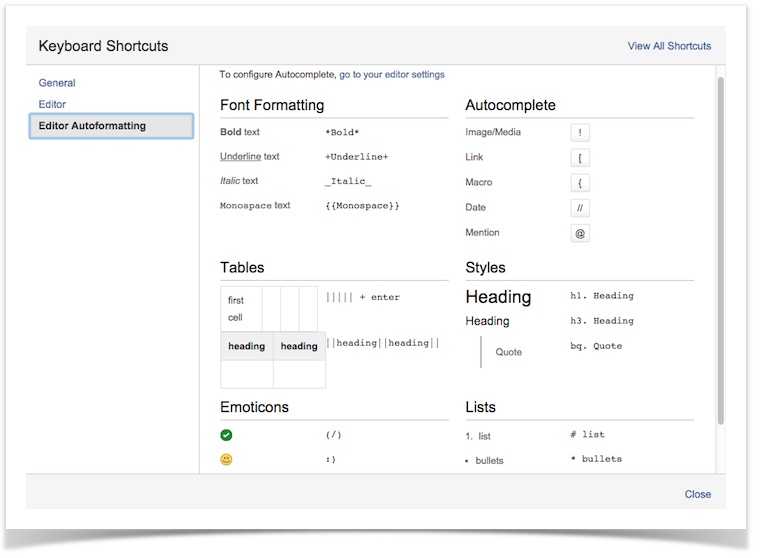
Rich Text: “Editor autoformatting is a little-known Confluence feature that allows you to convert text-only syntax (called wiki markup) into formatted content as you type. For example, if you enter h1. Biggest heading, it will be converted into a first level heading. The same is true for other headings, lists, text effects (bold, italic etc.) and much more – and you can do it without even touching your mouse.”
In addition, there are keyboard shortcuts for each formatting option, e.g. Ctrl+B to bold a selected word or phrase in Confluence.
Round #9: Having Full Markup Control
Markdown: “Since all content is in a plain-text format, writers have total markup control. If there’s an error in the markup, you can fix it easily – assuming you know the correct Markdown syntax.”
Rich Text: “If you are working solely in a WYSIWYG (what you see is what you get) editor, you can’t fix formatting problems. It’s much easier to access the markup directly – and with the free Confluence Source Editor add-on, this is a real option for wiki users, too.”
Round #10: Displaying Formatted Content
Markdown: “Formatting? I don’t need to be formatted, my content is plain text! If you want to display content in style, just hit the preview button in your Markdown editor, or run a quick text-to-HTML conversion script.”
Rich Text: “Bah! Plain-text purist! Why don’t you come and join us in the 21st century? Whatever formatting you’ve selected, it will look the same afterwards, or at least very similar. There’s nothing else for authors to do.”
Round #11: Collaborating, Saving and Restoring
Markdown: “You’ll need to save your text file and other resources, such as images or styles, in a local directory, and/or a version control system like Git. Version control systems (VCS) are great for managing, comparing, merging and updating text-based files such as source code. They also allow developers to work with those files in multiple branches or versions at the same time. Since most software engineers already have access to a VCS, such as the Github Pages hosted service, this may not be a hurdle for them.”
Rich Text: “To save a wiki page, just hit the Save button. Every time you edit content, a new page revision will be created automatically. You can restore older revisions of a page easily, or even manage multiple versions of your pages with the Scroll Documents app for Confluence.”

Round #12: Deploying Content as Website
Markdown: “Many static site generators, such as Jekyll, allow you to build websites with your Markdown content. Jekyll doesn’t require any database-driven CMS, but you’ll need to be comfortable working with config files and command lines; you’ll also need an understanding of source control platforms like Github. This approach might be particularly attractive for software engineers, but less tech-savvy authors may not be quite as keen.”
Rich Text: “Rich-text wiki platforms like Confluence are geared towards users who want to write content and publish it instantly. When creating a new Confluence page, you don’t need to run a build script afterwards to display the formatted content in the web browser – it’s already there.”
And The Winner Is …

You, the writer! When creating assets such as notes, readme files or other content including large sets of documentation, you can choose the text processor best suited to your workflow.
Casual users will find it easier to write, collaborate and track changes with Confluence. If you’re already familiar with version control, e.g. with Git, Markdown is also an option – particularly for software engineers. But it’s difficult to compare an out-of-the-box content management solution like Confluence with a plain-text format and toolkits for building static web resources.
Perhaps you want the best of both worlds – Markdown’s minimalism, but with a rich-text editor’s advanced formatting functionality? If so, you can use the Atlassian Confluence collaboration platform and still write using Markdown. With Confluence, you can easily insert existing Markdown content, or embed it using the Markdown macro. And by using this approach, Markdown and Confluence both come out on top – meaning everyone’s a winner.
Do you use Markdown to write documentation? Do you have a different perspective on collaborative authoring? Please let us know in the comments, or drop us an email at hello@k15t.com.